Showing posts with label before and after. Show all posts

Thursday, May 22, 2014

Pop Up Camper - Part 2

We've been making quite a bit of progress on the pop up lately. You can check out part one here. After Jason took all of the cabinets out, I scraped off all of the loose papery bits then gave it a good cleaning with a TSP substitute. I don't think this is a necessary step, but I did it anyway. I guess it can't hurt. We were originally going to reuse the hardware, but they weren't in very good shape. We removed those and I patched the holes with some wood putty. After that I gave it a coat of Primer. I used Zinsser Bullseye 123 Primer. It stuck to everything which was really nice! Then I finished off everything with two coats of Behr Dark Cavern. 

P.S. It looks like I shouldn't have stopped at the doors...our garage is in dire need of some new paint!

We really love the color. We weren't expecting it to have brown undertones but are very happy with it! We're keeping the white countertop for now. It's in pretty good shape, and I don't think it looks awful!

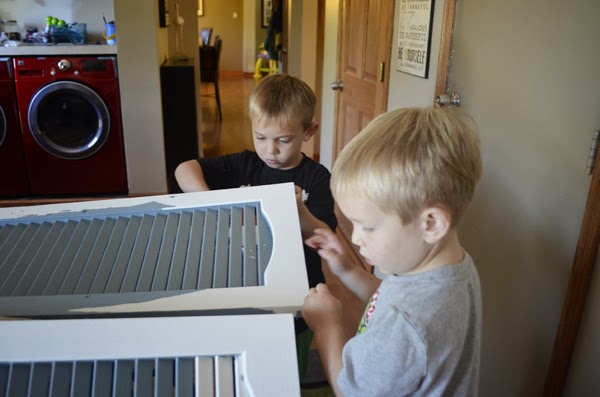
I'm so excited to see it come together. We had to get these big countertop/bench pieces out of the way so I can spread out to paint the doors, drawers and trim pieces.

Look - I'm helping! I think I've actually done more than Jason on the camper so far. Shhhhh, don't tell him!

While waiting for the paint to dry, I decided to tackle the cushions. We chose this awesome stripe fabric from Jo-Ann. It's an outdoor fabric so I hope it holds up okay. I used the old cushions as pattern pieces and reused the foam as well. The foam was in really great shape. I think I might wrap it in some batting though. That might help it fill out some of the corners. It seems a little loose since the cushions were already squished a bit on the corners from the old covers. I was going to use the old zippers, but we ended up finding some zipper by the yard in the upholstery section. It was about $5 to replace all of the zippers and now they match a bit better than they would have if I used the old ones.

The bottom of the cushions is a flannel backed vinyl. The original cushions used this same type of vinyl, but I'm still not sold on the fabric. It feels a little too flimsy. I hope it wears well. Note to self - next time use the walking foot like I knew I should have! The vinyl stretched quite a bit with the regular foot.

Stripes are tricky, that's for sure! I had to remember to line them up so that when the cushions are sitting on the bench the stripes will be in order. I also had the zippers all close toward the camper wall. The corners were a headache too. I could not figure them out for the bottom cushions. I finally found this post from another camper that posted pictures of what I knew was the way to do the corners. Sometimes you just need to see it. At least two of our cushions look nice and square with no puckers...we're just going to have to live with the other two! I don't think I'm going to redo them.

More camper reno to come!


Wednesday, May 14, 2014

Pop Up Camper - Part 1

So the Pop Up Camper Redo has begun. Here is the camper all popped out with the crazy awning/screen room. The screen room doesn't really work but the awning is nice. The camper is in pretty good shape. The canvas is relatively new and only has a few minor places where it needs to be repaired.

Before - front

Before - back

When we opened the camper and started moving things a bit, we noticed some pretty bad spots on the roof. Jason just patched the really awful spot, but we are going to wait until winter before we redo the whole roof. It's not leaking or anything so we should be okay but it needs to get fixed.

We took out all of the cabinets and made a bunch of dirt so the after photos look better. It's a good plan in my book. This is the front of the camper.

Back of the camper with cabinets removed.

I scraped all of the walls to remove the loose woodgrain paper. I cleaned it with a TSP cleaner. Then I put on a coat of primer and two coats of paint. We decided to go with Wilmington Tan by Behr. The color almost matches the canvas perfectly. We are painting the cabinets dark but I didn't want the walls to be dark as well even though you don't see much of them.

We replaced the flooring with click lock vinyl flooring. It looks so nice! What a difference it made! A lot of people use the sticky kind, but we like the idea of a floating floor a little better.

A view from outside the camper. Freshly painted walls, new floor...you won't recognize this place when we're done!

More updates soon!


Tuesday, March 25, 2014

Trying Something New

I've always wanted to learn how to reupholster furniture. I finally figured out that I had to just jump into a project. I'm starting with these two chairs. They were given to us by my mom. The plaid isn't really our style. The arms are all ripped and fraying. But the chairs are in pretty good condition otherwise. I like the seat height, and I like the traditional shape. 

Here's Kent's attempt to fix the arms of the chairs. He thinks tape can fix anything. Well, tape and dad.

I found this black and white houndstooth fabric at Hobby Lobby that was cheap enough to buy just in case my attempt at reupholstering didn't work out. But it's not cheap quality fabric. It's a nice durable upholstery. I think I'm going to love the more modern fabric on traditional chairs. I'm hoping to replace the rug someday (maybe with this one, maybe not) and paint these walls. I'm done with brown walls for right now.

I started taking one chair apart last month, but haven't really made much progress over the last few weeks. I'm hoping to get motivated again so I don't forget how I took the thing apart!!


Sunday, March 16, 2014

Sidelights Obscured

Before Christmas I took down my sidelight curtains to wash them. The once solid curtain panels were now striped from the sun and looked sick. I really liked the extra light that the uncovered sidelights brought in, so I left them alone for a couple of months. Then I really looked at them again. Those glass blocks are definitely NOT my favorite thing in our home. So I picked up some fabric from JoAnn and went to work. I think it's a vast improvement! Now to work on a new rug for this area...


Saturday, October 19, 2013

A House with Three Shutters

is like a horse with no name...

I don't even know what that means. All I know is that we look pretty awesome when we only have three shutters on our house. I love the screens too. They look fantastic.

You'll notice though that the two lights by the front door are changed and functioning! The other two are hung, but Jason still needs to run wire. I pulled out the mess of foliage that was on the side of the house. You can see where the sun has left a mark from the trellis. How do you fix that now?

For more front yard fun...I laid out the plan for the front yard here, and then updated progress here.


Thursday, September 26, 2013

Curb Appeal?

No, that can't be right. It's more like Curb Upheaval. Yea, better.

We've run into a few "chinks in the armor" if you will. What I thought was a foolproof plan has turned a total mess. I first posted about some changes I wanted to make to the front yard in this post. I was really not planning on doing anything about it until spring, but I was running some ideas by Jason and he said, "let's do it." So off to Menards I went to pick up my paint (Pittsburgh Paints' Chalky Blue) and some new shutters (since they had a rebate which made them $13 a pair). Then Jason decides that we should probably get a paint sprayer since that would make the job so much easier. I didn't argue since painting all of the louvers on the shutters seemed like an awful task. Then I pick up some outdoor lights that I found on sale at the Depot. Now we're into running conduit since we are adding lights on the garage. So much for quick fixes...
Maybe I'll just list what we've accomplished.

  • remove storm door - DONE (and I also managed to remove all of the weather stripping for the regular door too...oops)
  • painted the shutters - DONE (and we've also started to peel all of the paint off of the shutters since it isn't paintable plastic...oops)
  • removed one light fixture - DONE (but nothing is up in its place and there is now a hole in my front closet and on the front of our garage from running new wire...oops)
  • removed one shutter - DONE (and there are three still up there that are the wrong color. the fourth was sent to a scrap metal guy that drove by...oops)


One step forward, fifty steps back! The shutter situation is really the most frustrating. The plastic ones from Menards were not a fantastic choice but they were the right price ($26 for 4) and ALMOST the right size. Now that we've found out that they can't be painted, and we can't put our old ones back up since one of them went to the curb, we are looking for other options. Shutters are definitely more expensive than I was anticipating!

We'll figure something out though...and it will be fabulous!


Monday, September 09, 2013

Putting On A Front

I resolve to actually do something about the front yard in the spring. I keep ripping the same things out and they keep coming back and I don't replace them with anything. But next year is going to be different. In the spring, we will have a little more curb appeal than we have now. I know. You and I will BOTH believe it when we see it!

Here's the right now:

And the plan...
-replace the pine tree with a tree that is a better scale (and look!)
-add some interest with foundation and accent plants (maybe some dense yew, euonymus, grasses?)
-plant grass where the old flower beds used to be
-new shutters
-paint the front door (I'd love to replace it, but I don't think it's in the budget for next year)
-replace light fixtures
-get nice house numbers
-address the post issue (one fell down and the other is just dumb)
-get rid of the rocks!!
-do something with the mailbox?

Oh how I want to add BIG things to this list (like tear off the entire front) but we'll just settle for a few changes next year. Baby steps!


Saturday, September 07, 2013

Kara's Room

Welcome to Kara's room! I had the room planned out before the boys were moved out of it. Then we started moving furniture into the room and all the plans went out the window. Isn't that the way? The shape of the room made space planning a little tricky. We must have moved the crib a million times. I do love the way it came together though. I've included a source list at the end of the post.

There are still a few things that are in progress like lowering the curtains so they touch the floor and hanging the bow holder. I am planning on putting the bow holder above the changing table with some hooks for headbands and things, but I haven't found the right thing yet. I'm also debating whether or not to change the red ribbon to pink. I love the matryoshkas!

My first successful gallery wall. At least I think it is successful. It's also still a work in progress. I'd like to add a few more things, but I can't rush finding the perfect pieces. Maybe I'll add some vinyl on top, maybe.

A lovely little shot of three of my favorite children's books for girls...

My favorite art piece! I'm hoping to get either another one this size or two smaller ones at the Odeum Fall Festival this year. That way it will fill the wall a little better. Lynn Sanchelli of Painted Stuf is just a delight to work with! I first saw her work at the Odeum Fall Festival years ago. I always said that if I ever had a girl I would get this quote painted by her to hang in the nursery. I'm so glad I remembered! I emailed Lynn to see if she would create a pianting for me. She readily agreed and even asked for a color palette. I wanted to give her as much creative license as I could so I just sent a little picture of a fabric swatch. I just LOVE the finished product!

And just so we are keeping it real...we still need to do closet doors and put a door handle on her bedroom door. What girl doesn't want an air compressor in her closet? The table chandelier is another work in progress. I'm still considering if I should paint it and where I'm going to put it.

Sources:
Paint: Behr Hawaiian Shell
Ceiling fan and Tiffany glass light kit: Menards
Wall Vinyl: Etsy Shop - Cuma
Crib, Dresser and Changing Table: JCPenney
Curtains: Gypsy Ruffled Rod Pocket Sheer Panel from JCPenney
Eames Rocker: Gift
Laundry Cart: Country Door
Supergirl Picture: C2E2
Nauvoo Temple Watercolor: Mary Fielding Summerhays
Mary and Jesus: Kissing the Face of God by Morgan Weistling The girl who is modeling Mary was an investigator that Jason taught on his mission.
Matryoshka Print: Etsy gift
Kara Birth Details: Etsy gift
Other gallery wall items: various sources
Books: Flora and the Flamingo, My Name is Not Isabella, Just Being Audrey
She Believed She Could Painting: Custom Made by Lynn Sanchelli of Painted Stuf
Table Chandelier: local shop
Quilt: Details here
Air Compressor: Home Depot, haha!

For fun, here's what the room looked like when we moved in. We had basically stripped it and then started over. We also had to build a header for the closet so we could use regular closet doors instead of custom ones (not that we've ever installed closet doors, haha!). We did all of that back when we moved Clark into this room.

Clark's room was never officially finished, so I have very limited pictures of it. It was more finished than this picture, but we'll never have a record of it now. How sad! Now I know that I should take more pictures of the "almost done" too. Here's a picture of his hanging bed at least!

If you have any questions on other items just let me know and I'll see if I can find a link! Thanks for visiting!


Wednesday, June 05, 2013

The Last or the First?

9 SHORT months ago I sent this guy out into the world as a kindergartener.

He came home today a very excited FIRST grader!

This was his last bus ride of the school year. Everyday when the bus comes he patiently waits for the bar and stop sign to come out...as soon as it starts...he's off! It reminds me of horse racing or something. The gate opens and he runs to school. I'm so glad he likes it so much! 

Here is the Clark Fan Club that was able to come to Clark's Kindergarten Graduation.

Clark receiving his diploma from Mr. K.

A huge THANK YOU to this teacher for making Clark's first year at school such an amazing one.

I think Kent is a little star struck. I hope Mr. K. is around when he goes into kindergarten.

Happy Graduation Clark! Now let's have some FUN this summer!

Clark's Top 5 Things About Kindergarten
1. Centers
2. Meeting Awesome Friends
3. Getting on Mr. K's Shirt
4. Science
5. The Kindergarten Picnic


Sunday, May 12, 2013

Our Painted Ladies

We finally did it! We were able to observe the life cycle of the butterfly up close and personal. Last year we tried to hatch praying mantises, but it didn't work. Butterflies are much more reliable.


Here they are after they have had a few days to eat and get bigger. We were so surprised at how fast they grew!

Here they are after they have formed their chrysalis.

And finally we have painted laides! They boys loved watching the caterpillars turn into butterflies. What shall we try next year? Nothing too adventurous...they are still bugs, you know.

And some other favorite shots from the butterfly release! Come on Clark...mooooooove over!

Making some observations...

Completely oblivious to the fact that the butterfly is on his shirt!


LinkWithin

Related Posts Plugin for WordPress, Blogger...