
These beaded bookmarks are so cool. I used to make book thongs quite often, but these go above and beyond the book thong. I also like it because it can just be a little bit of bling for my Kindle as well. If you have a stash of beads and tools, the project is very inexpensive. I just bought beads in bulk for our Super Saturday, and we will be charging $3.50 ish per bookmark.

Materials List
1 or 1.5 mm elastic cord (18")
6mm split rings (2)
End Cap Crimp Rings (1)
3" Eye Pins (2)
2" Head Pins (2)
Beads of your choice
Tool List
Scissors
Wire Cutters
Pliers
Needle Nose Pliers
Round Nose Pliers
Split Ring Pliers
Time: 30-45 minutes
1. Cut your elastic to the desired length. I used 18 inches.

2. Thread one split ring onto the elastic.

3. Thread a bead through both pieces of elastic. Looks a bit like a lariat at this point. The detail show you how it looks when it is finished.

4. Align the ends of your elastic so that they are even.

5. Using your pliers, squeeze closed each side of the end cap over the elastic. Try to get most of the elastic under the metal. Squeeze it tightly!!

6. You are going to attach your split ring to the loop on the end of the end cap using split ring pliers.

7. Place the nub of the split ring pliers in between the split ring at one of the edges. Thread the end cap through just like you would add a key to your keychain.

8. Create two bead configurations on your eye pins. Eye pins have a loop on one end.

9. You are going to need an assortment of tools here to finish the edge off on your bead sticks.

10. Grasp the end of the eye pin with your round nose pliers. I usually grab it just a little above the beads. You need a tiny bit of room to make a spiral. Then take your regular pliers and wrap the end of the eye pin around the round nose pliers.

11. Using the regular pliers, continue wrapping the eye pin around itself creating a spiral look at the top.

12. Using your wire cutters, trim the end of the eye pin. If you aren't able to get the wire cutters close enough, you can squeeze the end tight with your pliers after you trim.

13. Attach your two bead sticks to your bookmark by threading them through the split rings on either end. Refer to Step 7!
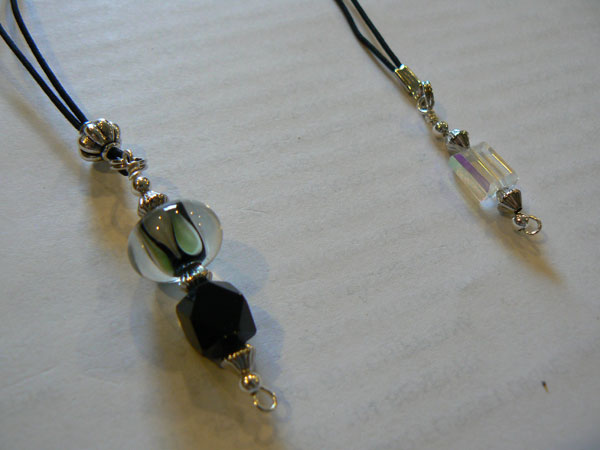
14. Now you are going to create two little beads to dangle at the end of your bookmark. You'll use head pins this time because they do not have a loop at the end. They look like really long stick pins for sewing. Thread the bead on the stick. Then use the above technique for creating a loop (Steps 9-12).

15. Attach these beads to the bookmark by looping them through the eye of the eye pin. I usually open the eye of the eye pin sideways (see photo). I think this keeps the strength of the loop a little better than opening it out straight. Hopefully that makes sense. Close the eye using your pliers.

16. Admire your work!

17. Thread your book through the elastic loop. You can tighten the elastic by pushing up on the "lariat" bead if your book is smaller than 9".

What a stylish way to save your page! Or you can just use it as Kindle/ereader jewelry if you'd like! Wouldn't these make great gifts for teachers, friends, neighbors, your book club (ssshhhh...don't read this if you are in my book club)? The list is endless. You can also personalize with charms to dangle instead of beads. There are so many cute things in the bead aisle these days.

Linking up to: Take A Look Tuesday at Sugar Bee Crafts, KoJo Designs Friday Fun Finds, and Tidy Mom's I'm Loving It
1 comment:
I have been wanting to make some of these forever...this tutorial might just have gotten me excited enough to make one! Thanks!! =)
Post a Comment